Cap Inspection 3D
目的
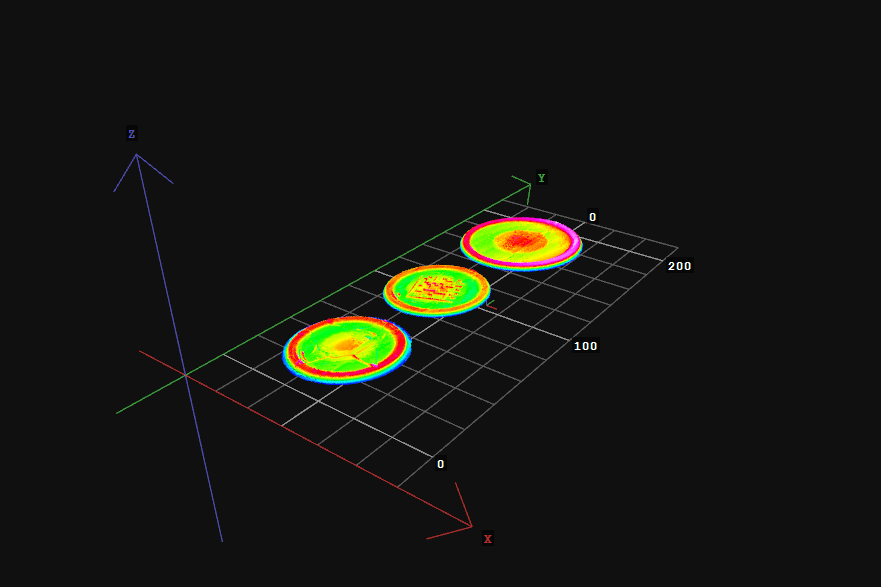
この例の目的は、3Dと2Dの相互運用性を示すことです。タスクは、キャップをセグメント化し、その平均高さと半径をチェックすることです。
入力
3Dスキャナーで取得したキャップの表面。

出力
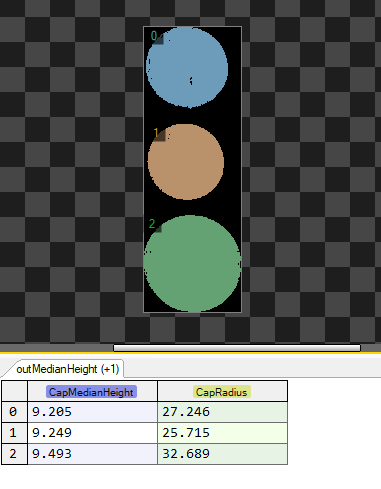
セグメント化されたキャップとその寸法の画像。

ヒント
Surfaceデータ型のポイントクラウドを取得したら、以下の手順を試してください:
- ポイントクラウドを画像に変換するフィルターを見つける。
- 領域分析技術を使用してセグメンテーションを実行する。
- キャップを表す塊を抽出する。
- 各キャップを個別に分析する:
接続のラベル付けについては こちらを参照ください。
Solution (AVS)
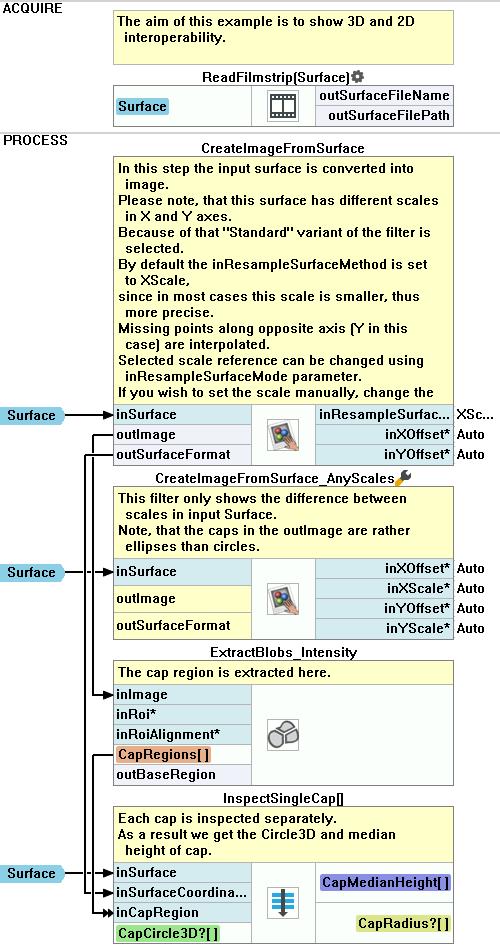
ワークスペースエクスプローラーでExamplesワークスペースを開き、フィルムストリップウィンドウでCap3Dデータセットを選択します。SurfaceチャンネルをACQUIREセクションにドラッグします。outSurface出力をSurfaceとラベル付けします。
CreateImageFromSurfaceフィルターを追加して、与えられた表面のz値の画像を作成します。これにより、入力データが3Dであっても2Dツールで作業できるようになります。SurfaceをinSurfaceに接続します。フィルターをクリックし、プロパティウィンドウでinPixelTypeをUInt16に設定します。inPixelScaleを0.010に設定します。
ExtractBlobs_Intensityを追加してキャップを分離します。CreateImageFromSurfaceのoutImage出力と接続します。inThresholdParamsのPolarityをBrightに、inProcessingParamsのMinAreaを500に設定します。outBlobs出力をCapRegionsとラベル付けします。見つかった塊を新しいプレビューウィンドウに表示します。
新しいステップマクロフィルターを作成し、InspectSingleCapと名付け、以下の入力を接続します:
- ReadFilmstripからのSurfaceをinSurfaceとして
- CreateImageFromSurfaceからのoutSurfaceFormatをinSurfaceCoordinatesFormatとして
- ExtractBlobs_IntensityからのCapRegionsをinCapRegion(Region)として
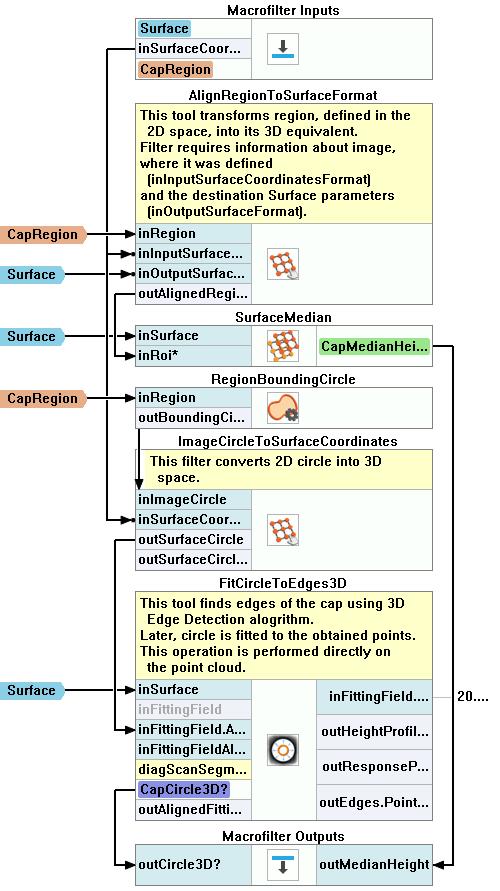
InspectSingleCapステップの内部に移動し、inCapRegion入力をCapRegionとして、 inSurfaceをSurfaceとしてラベル付けします。
AlignRegionToSurfaceFormatを追加して、 2D空間で定義された各領域を3D相当に変換します:
- inRegion入力をCapRegionに接続します。
- inInputSurfaceCoordinatesFormatをステップのinSurfaceCoordinatesFormat入力に接続します。
- inOutputSurfaceFormatをSurfaceに接続します。
SurfaceMedianを追加して、各キャップの中央高さをチェックします:
- inSurface入力をSurfaceに接続します。
- inRegion入力をAlignRegionToSurfaceFormatの outAlignedRegion出力に接続します。
- outMedian出力をCapMedianHeightとラベル付けし、 InspectSingleCapマクロフィルターの出力にoutMedianHeightとして接続します。
RegionBoundingCircleを追加して、2D画像上で見つかった各キャップの境界を見つけます。その入力をCapRegionに接続します。
ImageCircleToSurfaceCoordinatesフィルターを追加して、 見つかった2D境界を3Dバージョンに変換します:
- inImageCircle入力をRegionBoundingCircleの outBoundingCircleに接続します。
- inSurfaceCoordinatesFormatをマクロフィルターのinSurfaceCoordinatesFormat入力に接続します。
FitCircleToEdges3Dを追加して、キャップのエッジを見つけます。 後で、得られた点に円が適合されます。この操作は直接ポイントクラウド上で実行されます:
- inSurface入力をSurfaceに接続します。
- フィルターの下部にあるShow/Hide Portsをクリックし、inFittingFieldサブメニューの Axisオプションをチェックします。これを ImageCircleToSurfaceCoordinatesの outSurfaceCircle出力に接続します。
- inEdgeScanParams EdgeTransitionをValidToInvalidに設定します。
- outCircleをCapCircle3Dとラベル付けし、マクロフィルターの出力に接続します。 新しい出力をoutCircle3Dと名付けます。
Mainマクロフィルターに戻ります。InspectSingleCapのoutCircle3D出力を CapCircle3Dとして、outMedianHeightをCapMedianHeightとしてラベル付けします。 フィルターの下部にあるShow/Hide Portsをクリックし、CapCircle3DサブメニューのRadiusオプションをチェックします。新しい出力をCapRadiusとラベル付けします。
- CapMedianHeightとCapRadiusを新しいプレビューウィンドウに表示します。
マクロフィルタ メイン

マクロフィルタ InspectSingleCap

その他の資料
- ブロブ解析 - ブロブ分析手法について詳しく説明します。
- 数式 - 数式の使用に関する詳細情報です。
- Geometry 3D - List of filters useful in 3D geometry.
- Surface - Filters performing operations on surfaces in Aurora Vision Studio.

