Aurora Visio Studio TOP » Program Examples » Circle Fitting 3D
Circle Fitting 3D
目的
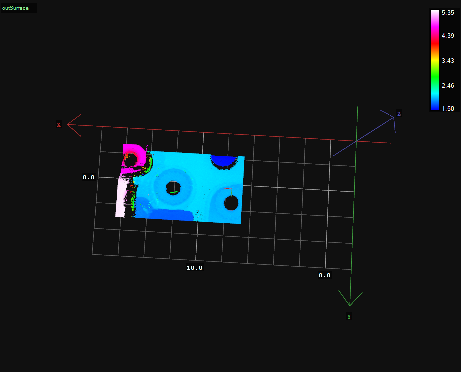
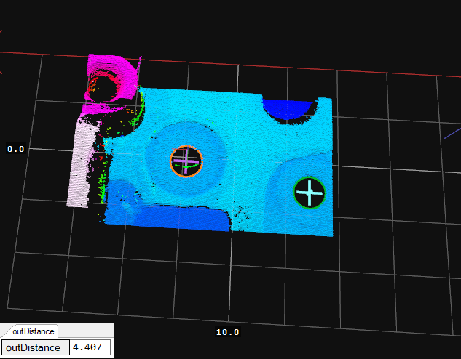
The task of the application is to measure distance between 2 holes in a scanned 3D object.
Input
The surface of the scanned object.
Output
Marked holes and their centers of the surface. Calculated distance between holes.
ヒント
Having acquired point clouds of the Surface data type, choose the part with the holes using the SurfaceValidPointsRegion filter. Then use FitCircleToEdges3D to locate holes and their centers. Use the PointToPointDistance3D to measure the distance.
Solution (AVS)
-
In Workspace Explorer open workspace Examples and in Film strip window select CircleFitting3D dataset. Drag the Surface channel to the ACQUIRE section.
-
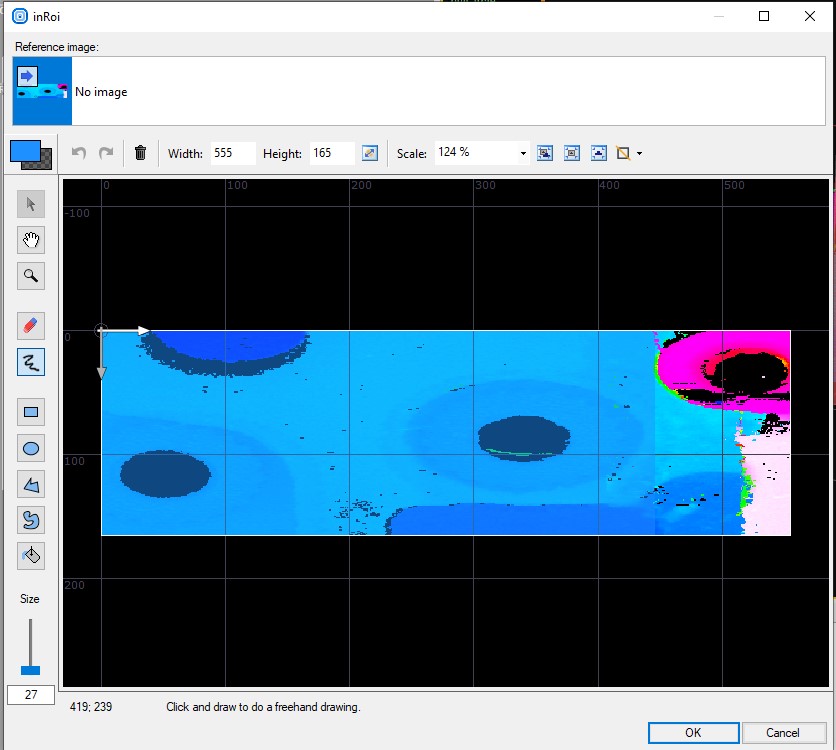
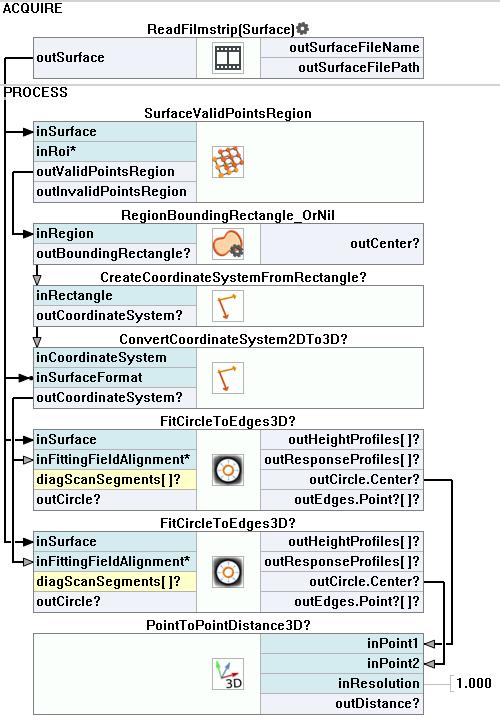
Add the SurfaceValidPointsRegion filter to focus on the part with the holes. Open the inRegion editor in the Parameters section and set rectangle containing only the lower located holes, similar to the one on the image below.
-
Create the local coordinate system based on the marked region:
- Add the RegionBoundingRectangle_OrNil and connect is input with the outValidPointsRegion output.
- Add the CreateCoordinateSystemFromRectangle and connect its input with the outBoundingRectangle output.
- Convert the 2D coordinate system to the 3D version with the ConvertCoordinateSystem2DTo3D. Connect it to the outCoordinateSystem output. Connect the inSurfaceFormat to the ReadFilmstrip outSurface output.
-
Add two FitCircleToEdges3D filters. Connect both inSurface inputs to the ReadFilmstrip outSurface output and both inFittingFieldAlignment inputs to the ConvertCoordinateSystem2DTo3D output. For both filters set these parameter:
- The inScanCount to 20.
- The inEdgeScanParams Edge Transition to InvalidToValid.
- The inOutlierSuppression to Tukey.
-
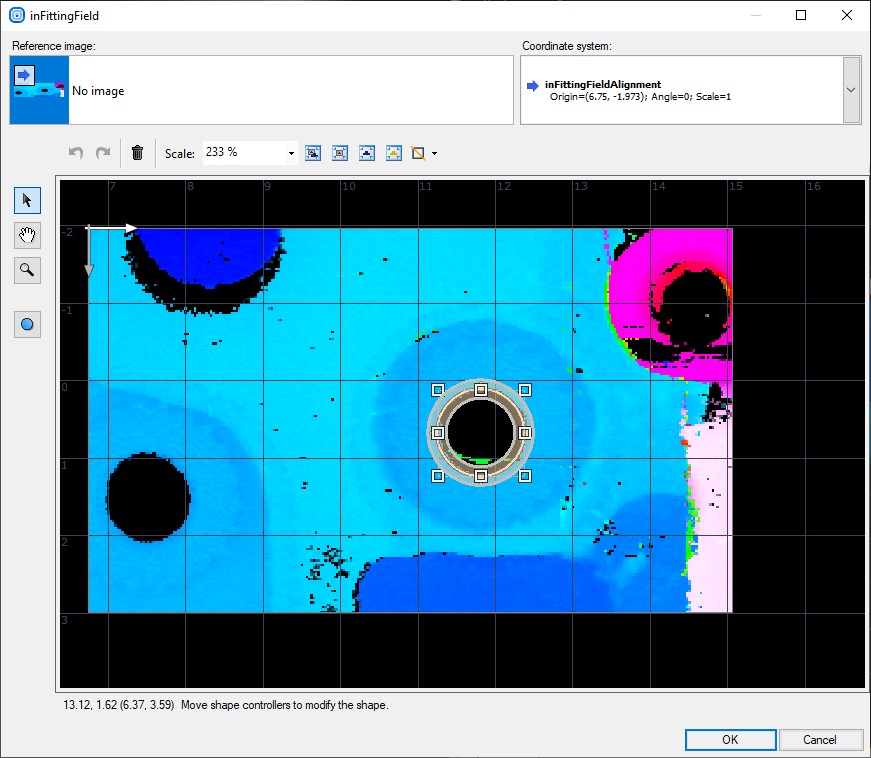
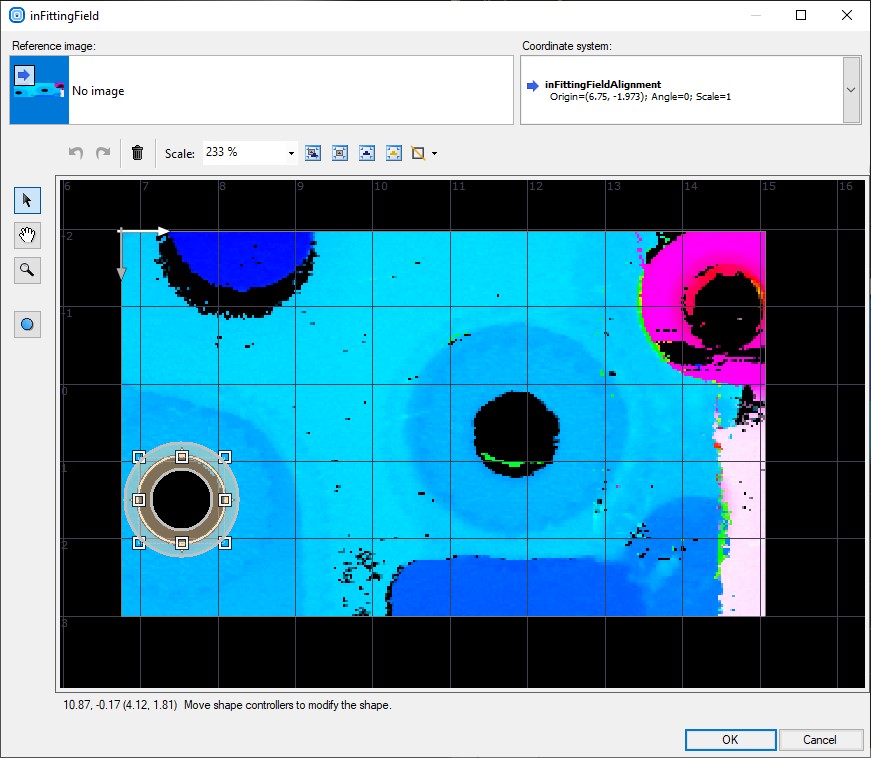
For the first FitCircleToEdges3D open inFittingField editor from the Properties section and mark the first hole as it is shown on the image below.
-
For the second FitCircleToEdges3D open inFittingField editor from the Properties section and mark the second hole as it is shown on the image below.
-
Add the PointToPointDistance3D filter and connect its inPoint inputs with both FitCircleToEdges3D outCircle.Center outputs.Show the found distance on a new preview window.
マクロフィルタ メイン
その他の資料
- Geometry 3D - List of filters useful in 3D geometry.

